step by step
December 22, 2022
Last updated on July 09, 2023
Getting a NIE in Spain is easy, as long as you know what to do. And I’ll tell you it all, step-by-step! To get the NIE in Spain you will start by making an appointment (cita) at a police station. This appointment can be set online at https://icp.administracionelectronica.gob.es/icpplus/index.html, following the steps described below. It is straight forward if you understand Spanish, so the following set of instructions may seem a bit redundant; anyway, for those that don’t know the language or feel a bit anxious dealing with bureacracy, I believe these instructions can be of use. I’ll be holding you hand through the process. Best of luck, I’m rooting for you!
Before we start, let me warn you that the pages on the site of the Spanish administration stops working if left without action for a while; so you may want to have an overall look at the process before actually going for it. If it stops, you have to restart from the beginning.
Table of Contents
Step 1) Choose the province where you’ll be getting a NIE in Spain.
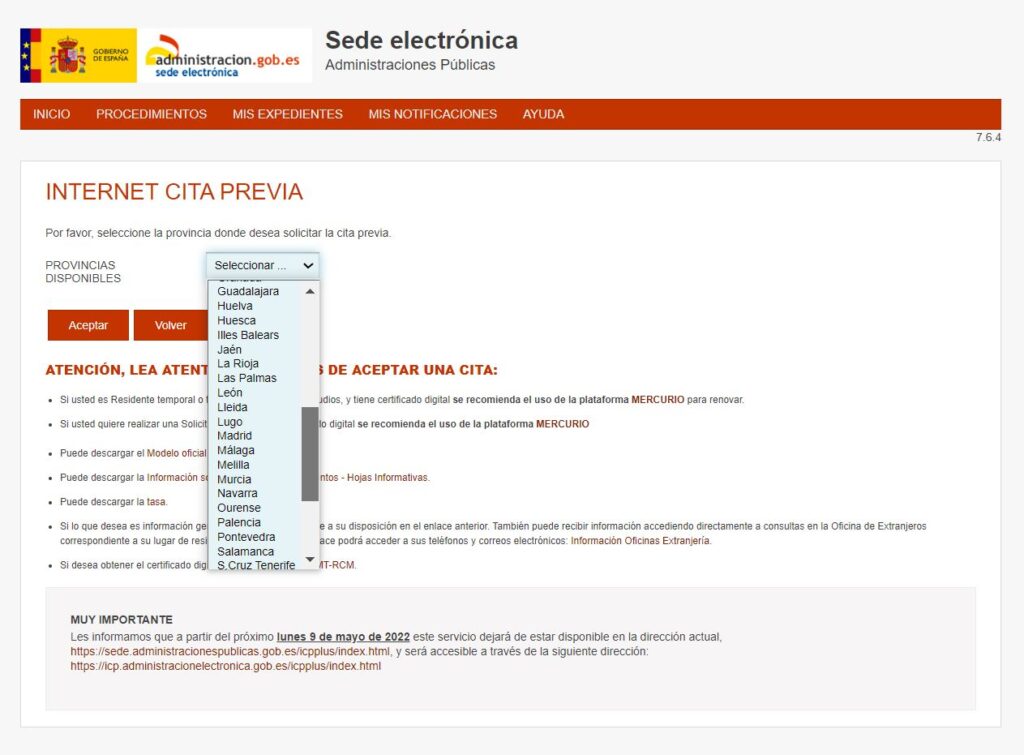
See the light blue bar? That is where you select, pressing on the arrow pointing down, in which province you intend to do your NIE. For this example (and in real life) I chose Malaga, the province where I live. Select your province and then press the red button Aceptar (accept). It will show the next page.
Step 2) Choosing in what office you’ll be getting the NIE in Spain
On top of this page there will be a lot of information about the services that are available, what to do, what not do, etc. Scroll down and you’ll find new blue bars under a few grey boxes. Focus on the light blue bars. The first is the choice of what office in the province of your choice will be the appointment. I suggest you leave “Cualquier oficina” (any office) as it is. You’ll see that in the end it will show you the list of offices with available times, and then you can choose from there 😉 If you choose now and there is no free time where you chose, you will have to restart the process.
The next blue bar is next to “trámites oficinas de extranjería” (procedures of the foreign affairs offices). Leave it blank. The following blue bar, next to “trámites cuerpo nacional de policía” (procedures of the national police) is where you inform that you are doing a NIE, by choosing “Policía-certificados y asignación NIE” as shown below.

Once again, press Aceptar.
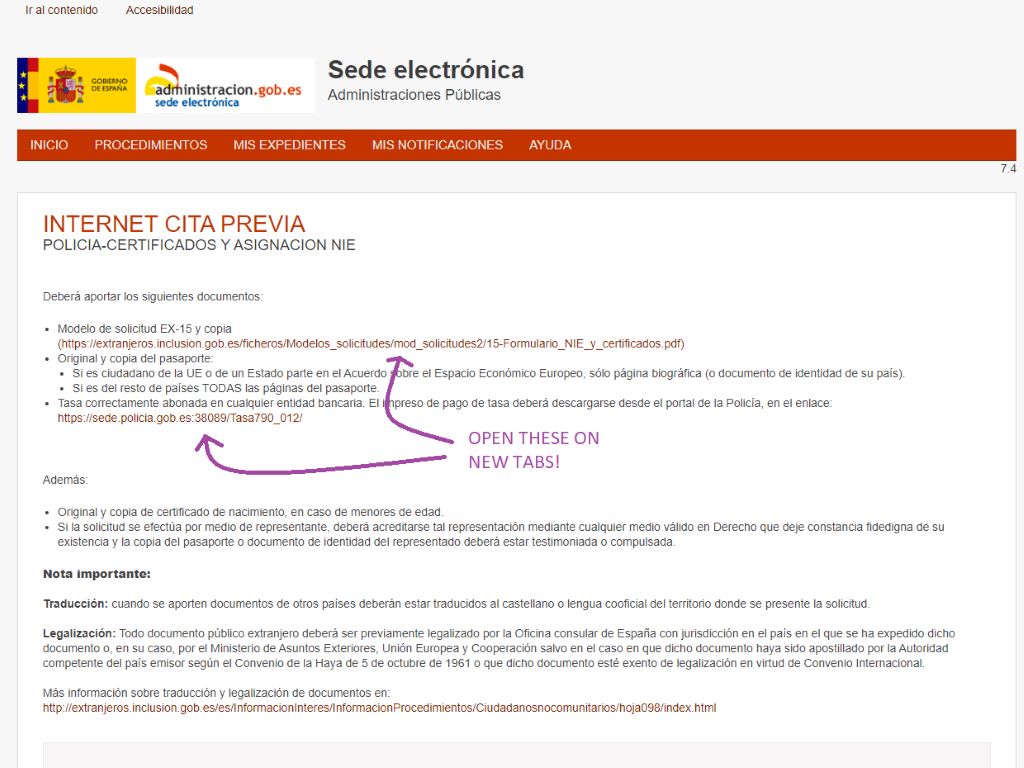
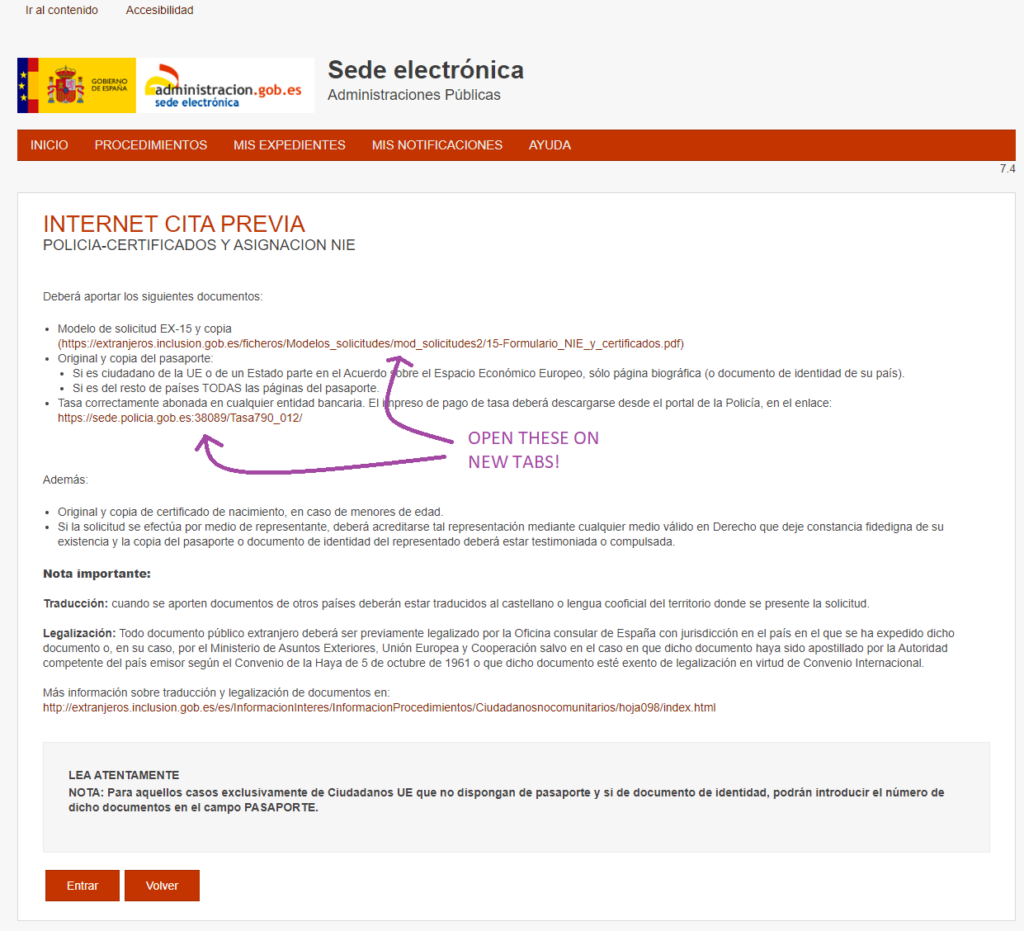
Step 3) Documents to take with you
And now, drum roll…. this step is super interesting: it has the list of documents you will need to provide on the day of your appointment and also the button for you to start booking your appointment. Cool, right? Printscreen or take a picture of this page (who knows? Some detail may have changed since I did this tutorial) and open both links that appear under “Modelo de solicitud EX-15” and “tasa correctamente abonada” on new tabs.
Now, you have a choice to make. You can either keep booking your appointment and deal with these documents later, or you can deal with these documents now and come back to complete the booking afterwards. Preparing the documents (as of may 2022) will envolve filling two forms, printing them in a papershop, making a copy of your passport and paying a fee in the bank. You can book yourself an appointment for a few days from now and have documents done before that date; if it seems too much to do in just a few days time, prepare the documents first.
If you choose to keep booking now, keep reading this step by step. If you choose to deal with the documents, let’s see them up close on the NIE documents page. After you are done with the documents, come back to the begining of this step by step.
We will deal with the documents mentioned on this page and with filling the forms you opened in new tabs later (the site blocks you if you take too long). For now, press the button where it reads ‘Entrar’ (Enter). There is where the booking really begins.
Step 4) Insert your data
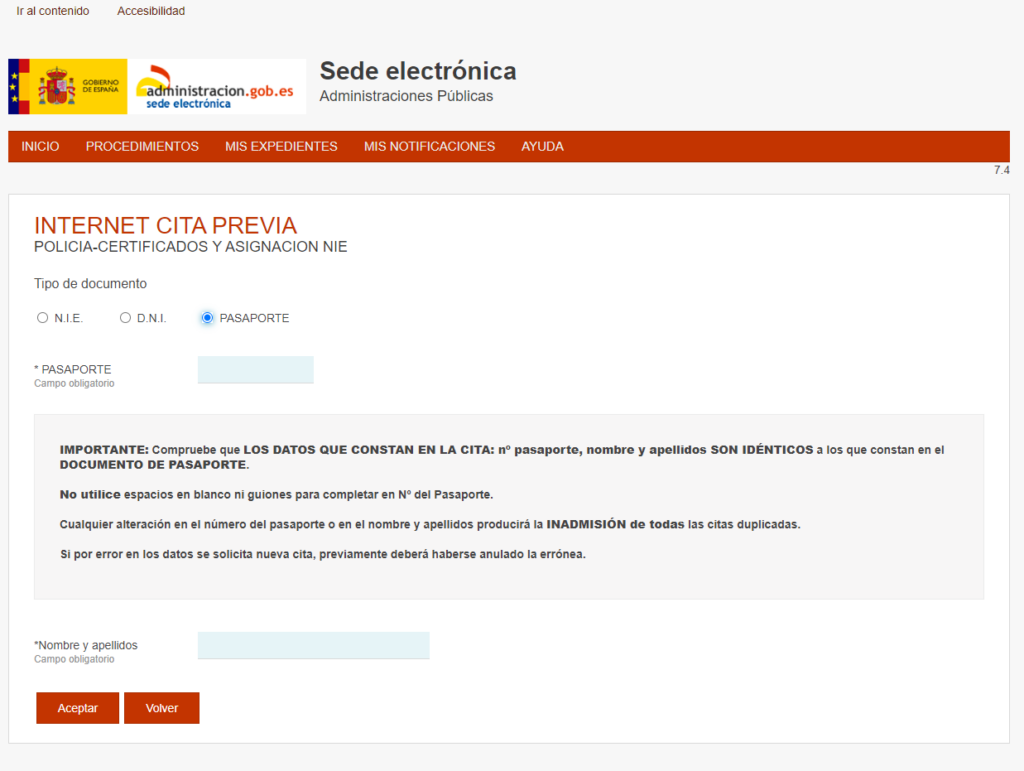
First you will have to choose Pasaporte (passport) as the document you will show to prove that you are you, as you don’t have a NIE or a DNI. So fill your Passport number in the first blue bar and your full name on the second. Press Aceptar (Accept).
Step 5) Ask for a time
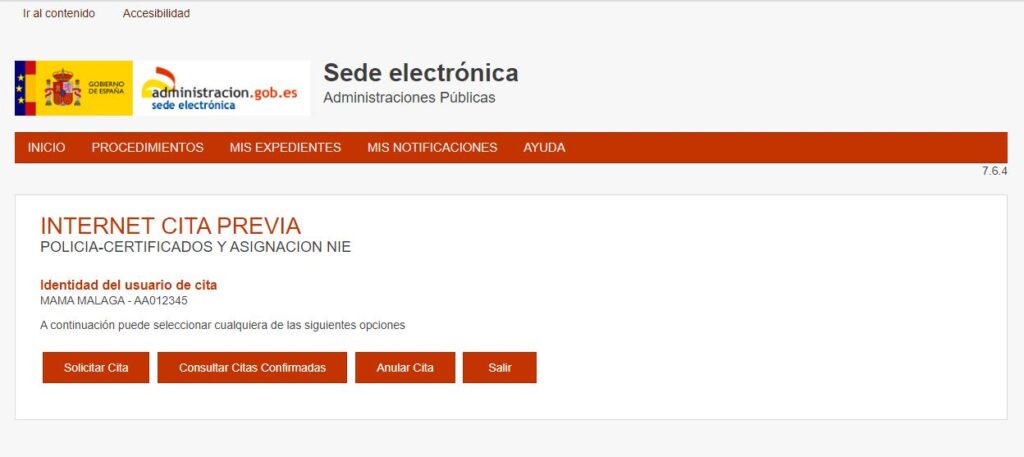
On this page, press the first button “Solicitar cita” to ask for an appointment. The other options are for checking appointment you have already booked, cancel previous bookings or exit the process.
Step 6) Choose the office
If you chose “Cualquier oficina” back in step 2, they will show you the locations where there are available times, followed by their address.

In my example, out of the 11 possible places to make a NIE in the province of Málaga, only 3 have available times as of the moment of this writing. If you are ok with one of the locations offered to you, select it and press Siguiente (next); if you don’t find any of the options convenient, you can press Salir (exit) and try again later or tomorrow – meaning restart the process from step 1. New spots come and go fast. Note that you can do the NIE in a different city than the one you live; it doesn’t matter. The NIE is a federal (country) level number, not a local document.
Step 7) The phone
It is almost done. You will need to provide a phone number now.
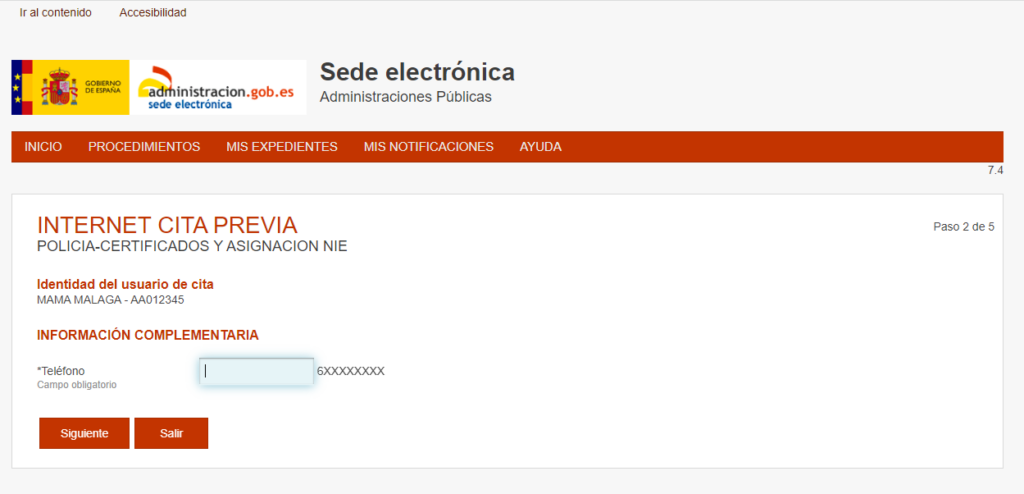
If you are doing this booking through a phone or tablet, you will receive a text with a code to confirm your appointment; this step is skipped when you book through a computer, but they still require a phone number. Fill it and press “Siguiente” (next).
Step 8) Pick your time
And here you can choose your date and time. You are presented with 3 possible dates and times available on the system. I recommend that you don’t book it for a very soon date, as you still have to deal with the documentation, that is not so fast (involves printing and going to a bank, and maybe more than one… we’ll see this later). Give yourself a week if possible, or at least 3 business days.
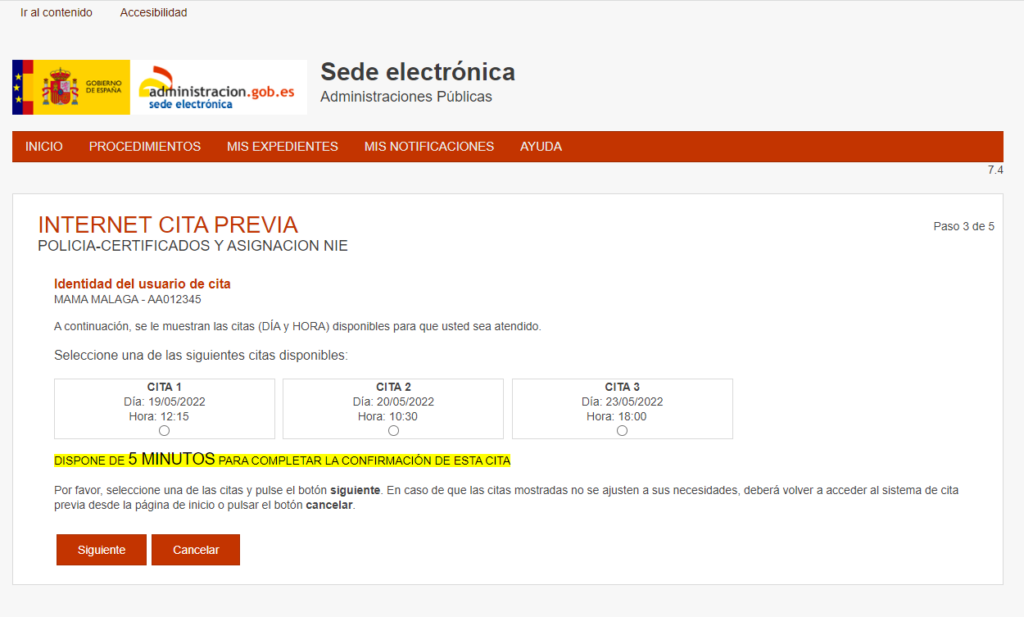
The highlighted line says you have 5 minutes to complete this appointment confirmation. Don’t panic, it is about the next page. Pick your time and press “Siguiente” (next).
Step 9) Victory!
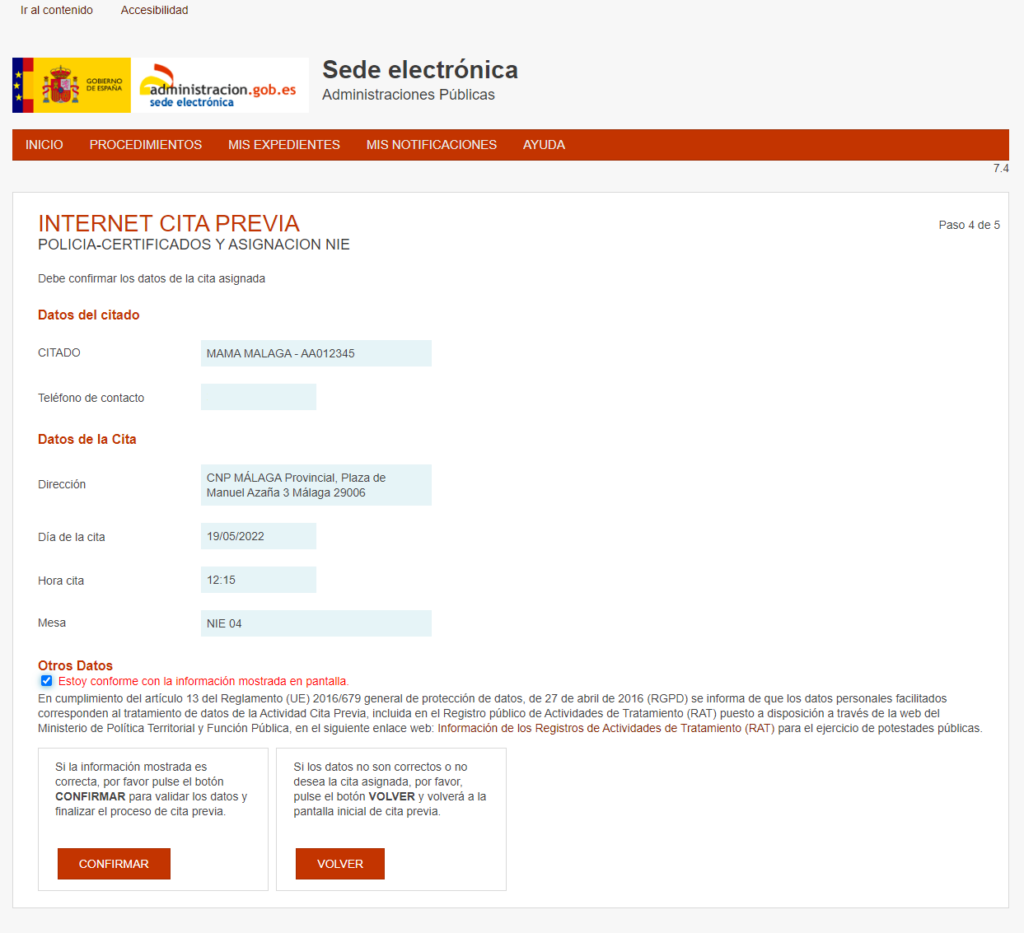
The following page is a final check. Read your data and if everything is correct, press the square that says “Estoy conforme con la información mostrada en pantalla” (I agree with the information shown on the screen) and press “Confirmar”(confirm). You see, this is what those 5 minutes where for.
Step 10) Save this
Congrats!! You are all booked and ready to have your NIE appointment!!! Keep your final page with you; you will need it on the day of the appointment. You can either print the page or have a screenshot of it on your phone. But you have to keep it.
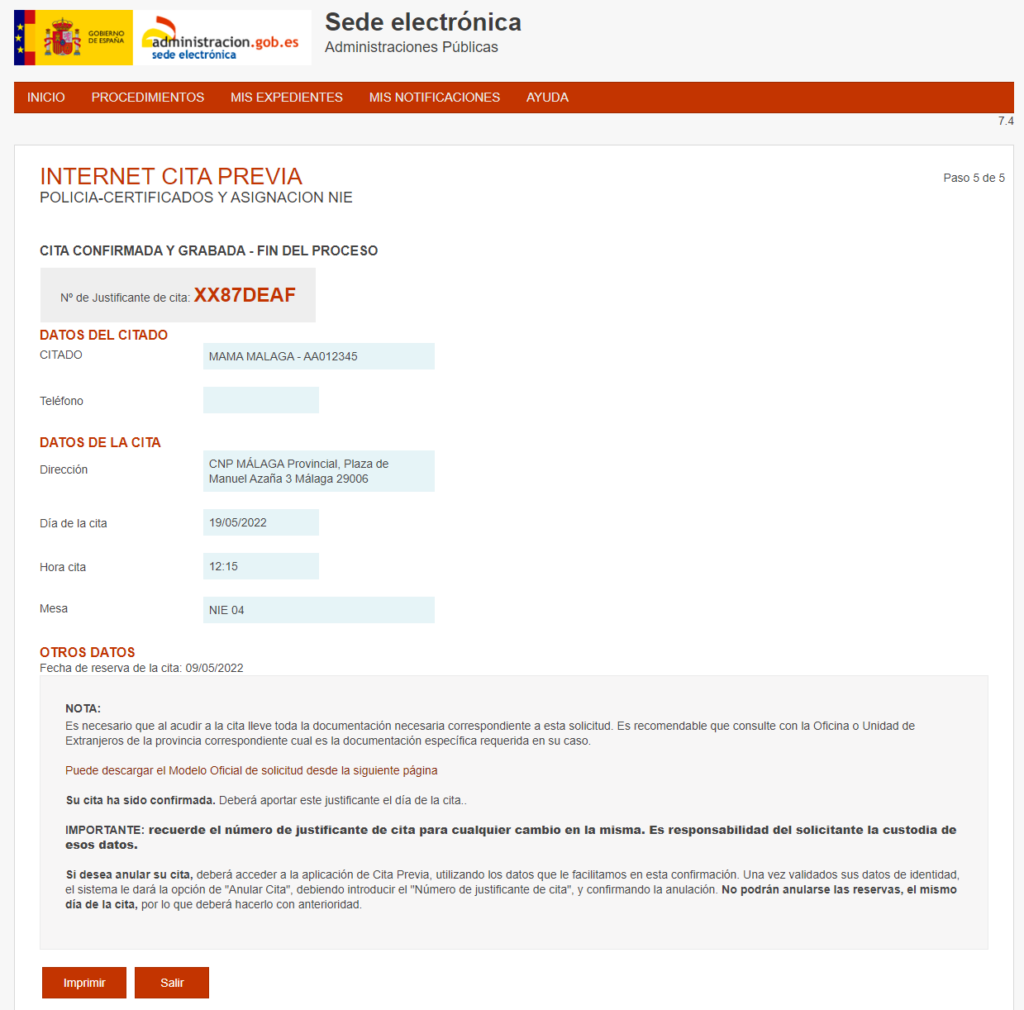
“Justificante de cita” means proof of appointment. Go to the police without this and you don’t cross the door. They do check it.
Now that you are all booked to have a NIE, you can deal with the documentation you will have to prepare to take with you on the appointment day. Those are the tabs you opened on step 3 and the picture / printscreen you took. In case you didn’t open the tabs nor took the picture or lost it, just pretend you are trying to book another NIE appointment up to that point, that is, repeat steps 1 and 2.
In both cases, check the NIE documents page, where we’ll check these documents under a magnifying glass (which I need, because these letters are so small!)
NIE pick up
Sometimes the NIE is delivered right at the appointment; sometimes they request you to come back to pick it up some days later. They will inform you what your situation will be on the appointment.
If you have to go back, well… then some two days after you succeed in your NIE appointment you will need to go to the same site where you originally booked your NIE to book a new appointment, this time to collect your brand new NIE. The booking procedure is similar to the NIE’s, so we’ll do here just an overview of the NIE pick up booking.
The website is https://icp.administracionelectronica.gob.es/icpplus/index.html. There, choose the same province and office where you did your NIE. Important: don’t choose “Cualquier oficina” now, choose the one where you had your NIE appointment.
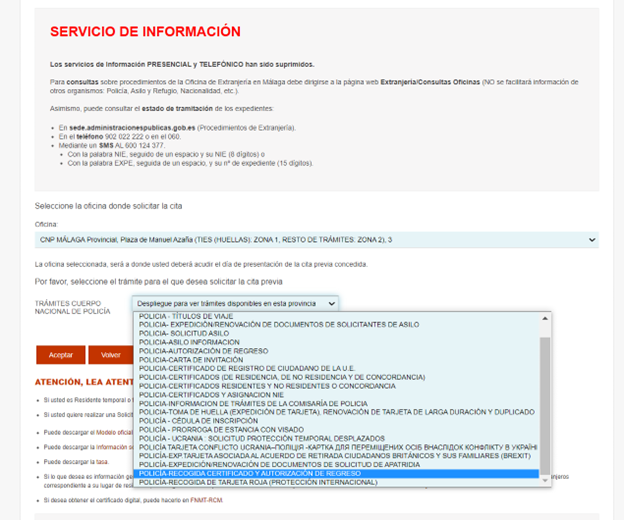
This time, though, select the service that says “Polícia-Recogida Certificado y Autorización de Regreso” (Police- certificate pick up and return authorization). Press Aceptar (accept).
The next page informs that only the owner of the document or someone legally authorized by the owner can collect it and that passport or other ID must be presented, as well as the paper that was given on the day when the NIE was processed.

Press entrar (enter).
From the next page on, it is very similar to booking a NIE. You’ll write your passport number and name on a page; on the next ask for an appointment in solicitar cita; on the following fill your phone and e-mail to get to the page where you choose a suitable time.
There will be another confirmation page and yes, another proof of appointment, that you should bring with you on the bright and sunny day when your NIE will be delivered. Bring your passport and any paper they gave you on your previous NIE appointment too.

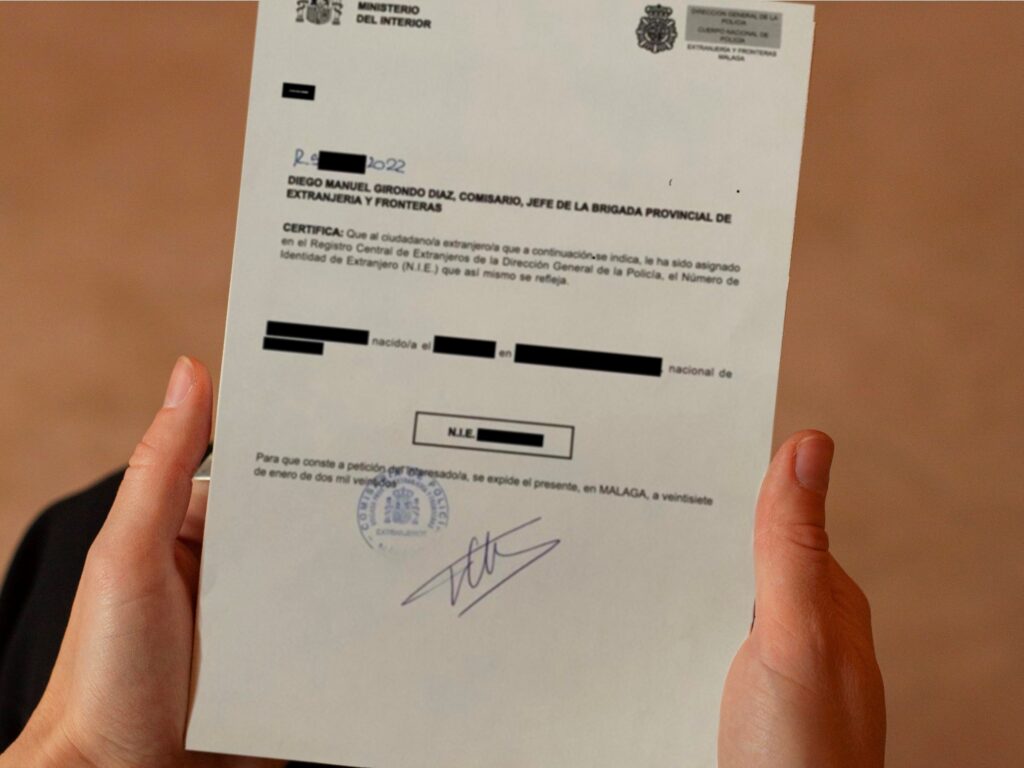
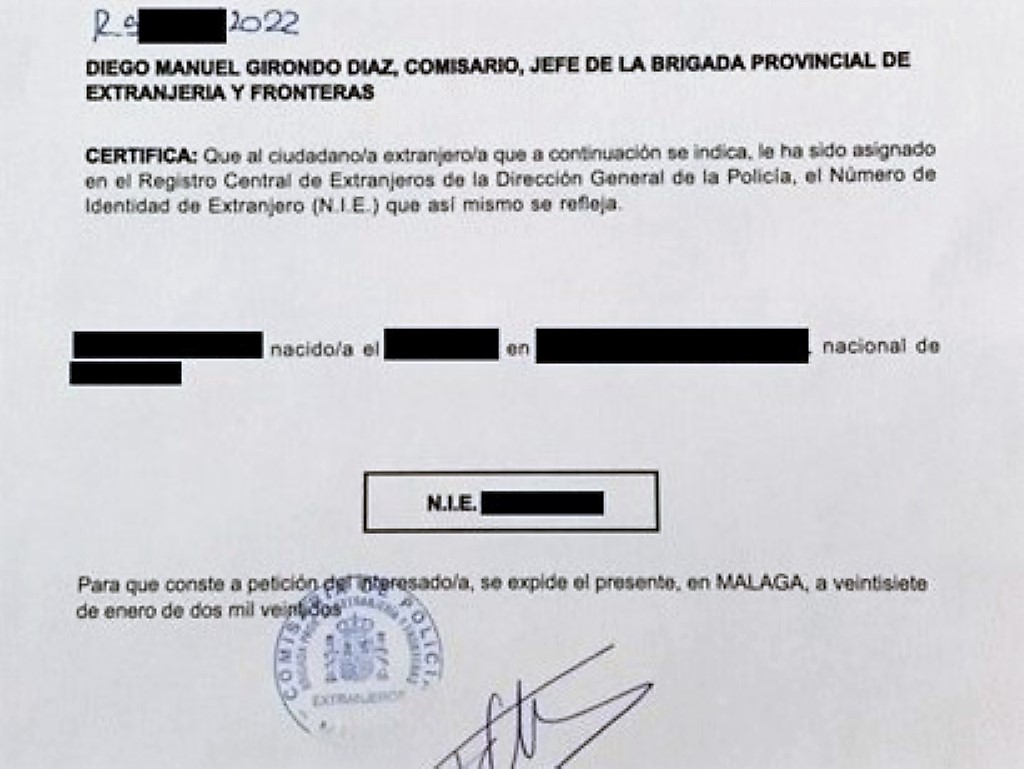
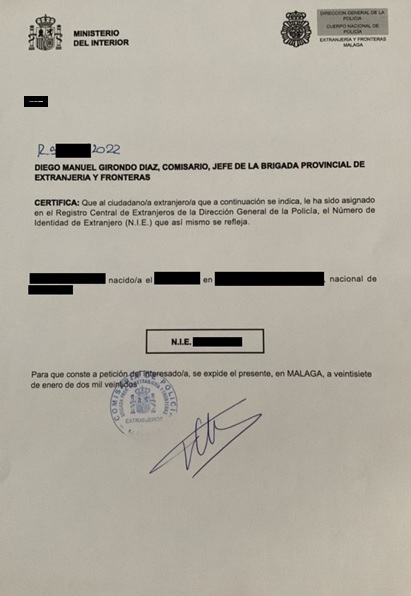
On the lovely day you get your NIE, you will be given a simple A4 piece of paper like the one below and a glass of champagne (provided that you give yourself the champagne, clearly; the Police will not do it, but you deserve it). The NIE is not exactly a document per se, it is more like a number, and it is a very important and relevant number.
Make sure you take pictures (preferably before opening the champagne) and send them to your e-mail. Write that number down where you keep the other important numbers. Don’t lose it, at least not in the first month – by the end of that, you will have been asked this number so much that you will already know it by heart. Welcome to Spain.
Next: NIE documents (documents to make the NIE)